Microsoft Word Basics
Changing the font
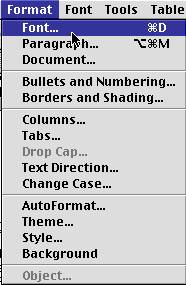
There are several ways in Microsoft Word to change the look of the text. We will start with the most complex, but the one that is always visible. Click on the Format menu (at the top of the screen between Insert and Font) and go to Font. This will open the Font window.
![]()
 From the Font window, you can change every aspect of
the way the text looks. You will notice that the default is Times Regular
12pt.
From the Font window, you can change every aspect of
the way the text looks. You will notice that the default is Times Regular
12pt.
If you change any part of the font, the preview window will show you what your text will look like. To preview what a font will look like, simply click on the name of that font. To change the font to Italic or Bold, click on those words under Font Style. To change the size, either type a number in the size box or use the up and down arrows to pick a larger or smaller size.
Almost every function in the font window has a toolbar shortcut or a keyboard shortcut to go with it, making it easier and faster to accomplish. We’ll start with the actual font. In MS Word 2001, there are 3 other ways to change the font. The first is by using the Font menu. In the font menu is listed every font available on your computer. To choose a different font, go to the font menu and click on the font you want to use.
The second way is to use the formatting toolbar. Your version of Word may not automatically display the formatting toolbar. If it doesn’t, go to the View menu, then to Toolbars, then to Formatting.
![]()
The formatting toolbar
The font is the second box on the toolbar. Clicking on the arrow to the right of the font name will bring up a list of all the fonts available.
The final way to change the font is by using the Formatting Palette. If you do not see the Formatting Palette, click on View and go to Formatting Palette. The Formatting Palette works the same way as the Formatting toolbar.
Note: not all computers have the same fonts installed. If you begin a document on one computer, save it and take it to another computer, the fonts may not appear correctly. In order for the font to be displayed correctly, it must be installed on EACH computer you use.
Several of the other features of the Format à Font window are also available on the Formatting toolbar and palette. The size, color, bold, italic and underlining can all be changed using the formatting toolbar or palette.
To change text you have already typed, highlight the text, then change the things that you want to change. It will be applied to all the text that is highlighted.
Hints and tips: If you don’t know what a button does, put your mouse over it (don’t click) and after a few seconds a box will appear telling you what tool it is.
If you make a formatting change (font, color, size, etc.) then hit the delete key, it will delete the changes you made. This will also happen if you type some text and then press the delete key more times than the number of keystrokes you have made (i.e., if you type the word mouse, then hit delete 6 times, the formatting changes you made will be deleted when you begin to type again.)
If you are using an older G3, the names and sizes of the fonts may disappear in the formatting toolbar or palette. This is a glitch with the operating system and hopefully will be corrected when we upgrade the OS on the G3s. If this happens while you are typing, save your work, quit the program, wait a few minutes and restart MS Word.
Aligning Text
Again, we will start with the menu, since they are always there. Starting with Format again, this time go to Paragraph. In the Paragraph window, in the upper left corner is Alignment.
To re-align text, click on the arrows to the right of the word Left. A menu will pop up that gives you the choices of Centered, Right or Justified. Centered and Right aligned text are pretty self-explanatory. Justified means that the text spacing will be adjusted so that the left and right margins are both even.
Aligning the text can also be done using the Formatting Toolbar and Palette.
![]()
![]()
![]()
![]()
![]()
Left Alignment Centered Right Alignment Justified
Inserting clip art
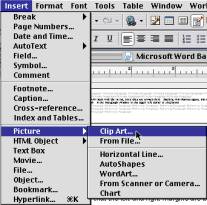
Inserting clip art is relatively easy. Go to Insert on the menu bar, and drag your mouse down to Picture. Another menu will pop out to the side. Go over and click on Clip Art. This will open the clip gallery.
![]()
![]()
![]() In
the clip gallery, you can type in a keyword to search for pictures or you can
search through the different categories of clip art. There are literally
thousands of pictures you can find. There are also borders, buttons, web art
and many other graphics. To insert a picture once you have found it, make sure
it is highlighted, and click on the Insert button on the bottom right of the
window.
In
the clip gallery, you can type in a keyword to search for pictures or you can
search through the different categories of clip art. There are literally
thousands of pictures you can find. There are also borders, buttons, web art
and many other graphics. To insert a picture once you have found it, make sure
it is highlighted, and click on the Insert button on the bottom right of the
window.
![]() Once you have put the clip
art in your document, you can resize it by using the ‘handles’ on the corners
and sides of the picture. Move your mouse over one of the handles, and when
the pointer changes to this symbol you can click and hold the mouse button and
move your mouse away from the center of the picture to make it larger or toward
the center to make it smaller (this is called click-and-drag). You can also
change how the text wraps around your picture by double clicking on the
picture. This will bring up the picture properties. Clicking on the Layout
tab will allow you to change the text wrapping options and place your picture
on the left, right, or center of the page.
Once you have put the clip
art in your document, you can resize it by using the ‘handles’ on the corners
and sides of the picture. Move your mouse over one of the handles, and when
the pointer changes to this symbol you can click and hold the mouse button and
move your mouse away from the center of the picture to make it larger or toward
the center to make it smaller (this is called click-and-drag). You can also
change how the text wraps around your picture by double clicking on the
picture. This will bring up the picture properties. Clicking on the Layout
tab will allow you to change the text wrapping options and place your picture
on the left, right, or center of the page.